便利な方法がありましたので共有します。
Autometer を設定する
LaunchPad から Autometer を起動
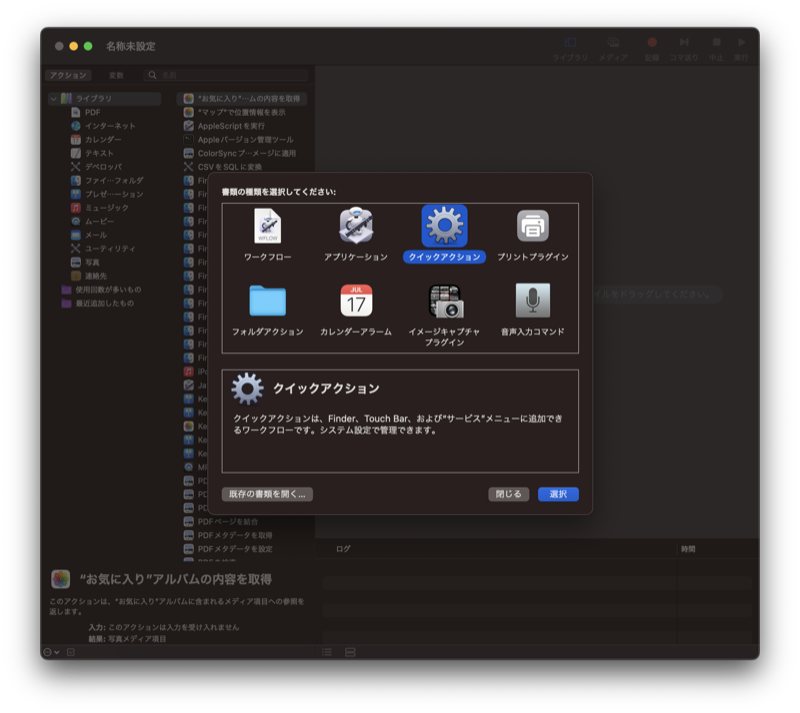
ファイル > 新規 > クイックアクション
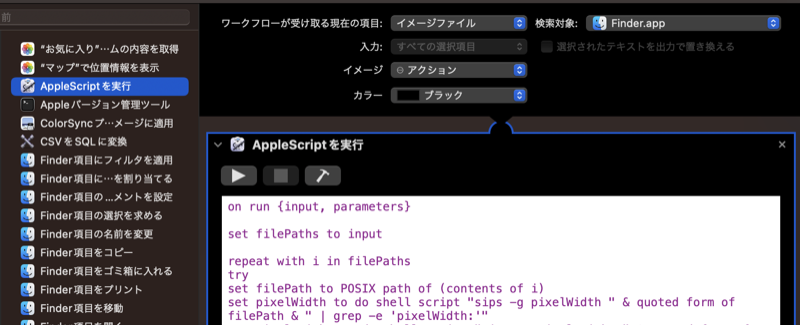
ワークフローが受け取る現在の項目を「イメージファイル」、検索対象を「Finder.app」、「AppScript を実行」を右のスペースにドラッグし、コード入力には以下のように記述します。
サイズは 800 としましたが、違うサイズが必要な場合は適宜書き換えてください。(4箇所)
on run {input, parameters}

set filePaths to input

repeat with i in filePaths
try
set filePath to POSIX path of (contents of i)
set pixelWidth to do shell script "sips -g pixelWidth " & quoted form of filePath & " | grep -e 'pixelWidth:'"
set pixelHeight to do shell script "sips -g pixelHeight " & quoted form of filePath & " | grep -e 'pixelHeight:'"
set w to (text ((offset of "  pixelWidth: " in pixelWidth) + 14) thru -1 of pixelWidth) as number
set h to (text ((offset of "  pixelHeight: " in pixelHeight) + 15) thru -1 of pixelHeight) as number

if w > h then
if w > 800 then
sizeAdjustment(filePath) of me
end if
else if h > w then
if h > 800 then
sizeAdjustment(filePath) of me
end if
else if w = h then
if w > 800 then
sizeAdjustment(filePath) of me
end if
end if
end try
end repeat

return input
end run

on sizeAdjustment(aPOSIX)
do shell script "sips -Z 800 " & quoted form of aPOSIX
end sizeAdjustment
すべて終わったら ファイル > 保存 で任意の名前にしてください。
Finder で選択する名前になりますので、わかりやすい名前にしておきましょう。
(ここでは image_resize_800 とします)
Finder で動作を確認する
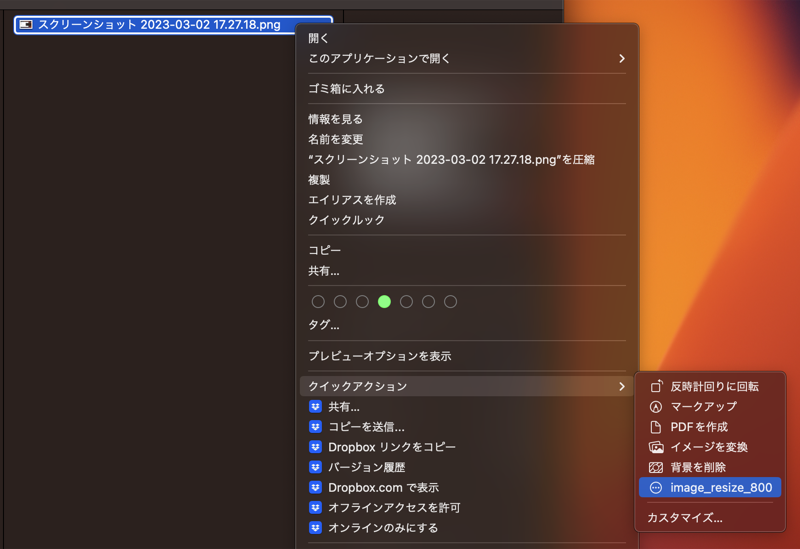
画像ファイルを選択し、2本指クリック(Ctrl + クリック)> クイックアクション > image_resize_800 を選択
* image_resize_800 が存在しない場合、Autometer で正しく保存されていない可能性があります。
正しく動作すると、スクリーンショットの横、縦のうち大きい辺が 800px になるよう画像がリサイズされます。
参考
こちらを参考にしました。貴重な情報&コード、ありがとうございます。